RSS Feed
  1. Recognize Interchangeable Ingredients

    December 31, 2011 by Nina Spezzaferro

    You’ve heard the phrase, “Baking is a science;” it’s true. Just know that baking soda and baking powder are not the same thing. You can make any recipe your own by tweaking certain ingredients to your taste, so long as you maintain certain wet to dry ratios and observe measurements.

    Does a recipe call for vanilla extract? Try almond extract or coconut extract if you think those flavors will work. If a recipe calls for liqueur, use one you have on hand if it will complement the recipe. Substitute one chopped nut for another. Eliminate raisins if you hate them. You can easily create your own signature desserts by using recipes as your scientific formula and your taste buds as your guide.


  2. Check For Doneness

    December 31, 2011 by Nina Spezzaferro

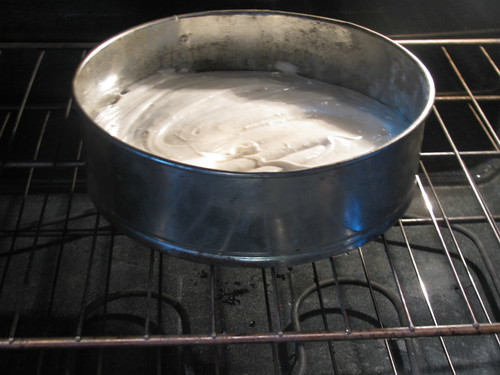
    Image by Suzi Jane

    While recipes are the best guide you have to determine how long something needs to bake for, there are many variables to consider, such as altitude, humidity, oven size, and so on. If your recipe was discovered online, you might consider perusing the recipe comments and reviews to see if anyone’s commented on the bake time.

    A few minutes before the recipe is supposed to be finished baking, check on it. A lot of bakers use the toothpick trick – inserting a toothpick into the center of the cake to see if it comes out clean. Or you could try the finger method by pressing a clean finger in the center of the cake to see if it springs back (it’s done!) or sinks in (let it bake a few more minutes). In other words, your baked goods need supervision because a burned cake just can’t be saved.


  3. Rotate Your Pans

    December 31, 2011 by Nina Spezzaferro

    Photo by frugalupstate

    This is another tip, courtesy of my mom. Just as ovens often don’t have an accurate temperature dial, they have a tendency to bake unevenly.

    Rotating your pan 180 degrees midway through the baking process will help ensure your confections bake evenly.

    The February 2011 issue of Reader’s Digest suggests lining a cookie sheet with a layer of white bread slices and baking them under the broiler to determine where your oven is the hottest. From there you can better figure out how to rotate your pans for more even baking. For the full how-to, check out 3 Shortcuts From All Over.

    (Thanks to Dad, who passed along the Reader’s Digest article.)


  4. Get an Oven Thermometer

    December 31, 2011 by Nina Spezzaferro

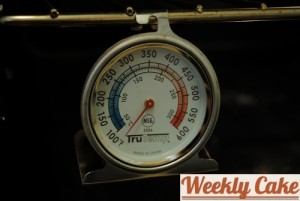
    I discovered this gem after baking at a few different friends’ homes. Since my mom is into baking, I grew up in a home that had a thermometer in the oven. So I assumed all ovens came with them. I’m not talking about the temperature dial on the outside, either. I’m talking about a round thermometer that hangs from the rack inside the oven.

    You might tell your oven to go to 350 degrees. But you know what? Your oven’s a liar and so is mine. An internal oven thermometer allows you to gauge how much your oven lies so you can adjust the temperature dial accordingly and ensure your baked goods are being baked at the proper temperature. It will also allow you to know when the oven’s finished pre-heating and will save you the grief of burned cookies or soupy cakes. And they only cost a few bucks.

    I would love to know, how much does your oven lie? Mine lies up to 50 degrees, so when pre-heating to 350, I set the dial to 400. Once you get a grasp on how inaccurate the dial is, you can yank it off, depending on your oven model, and readjust it accordingly. Those with digital oven dials (like me!) are out of luck on this step, which is why oven thermometers are crucial when baking.


  5. How to Sift

    December 31, 2011 by Nina Spezzaferro

    Some recipes call for ingredients to be measured, then sifted. Others call for ingredients to be sifted, then measured. And most recipes call for all dry ingredients to be sifted together. I sift every cake recipe’s dry ingredients, even if it’s just the boxed cake mix. I’d sift my morning coffee grounds if I had the time.

    What is sifting? It’s the act of passing dry ingredients through a fine grate to aerate and weed out clumps, resulting in light, airy cakes.

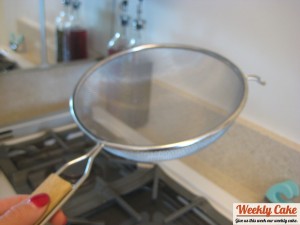
    You don’t have to invest in a fancy sifter either. The metal, hand crank style sifters tend to get rusty and are a pain to keep clean, which is why I prefer a simple strainer for sifting, pictured at left. You can also find plastic versions that work just as well at 99 cent stores and they’re dishwasher safe. They also come in handy for dusting finished desserts with powdered sugar or cocoa. Just place the dry ingredients in the strainer a little at a time and either shake the strainer back and forth or gently rub the dry ingredients against the strainer with your hand.

    Finally, be sure to heed any directions regarding sifting pre or post-measurement. I once made a cream cheese frosting recipe that called for four cups of sifted confectioners sugar with four unsifted cups. I’m lucky it didn’t induce any diabetic comas.


  6. Merry Christmas!!

    December 24, 2011 by Nina Spezzaferro

    Merry Christmas to you! Love, Nina


  7. Cooking With Dog Christmas Cake

    December 21, 2011 by Nina Spezzaferro

    Are you familiar with Cooking With Dog? You should be. It’s a Japanese cooking series on YouTube. I particularly love the “It’s not what you think…” tagline. Just because they’re Japanese, it doesn’t mean they’re using dog meat in their food. Oh, no. Dog is the co-host! Duhh!

    I particularly love the below episode in which we learn how to make a Christmas cake, which is really just a strawberry shortcake. But, it’s Christmas-y because it is decorated with powdered sugar on top of the strawberries to resemble snow.


  8. Happy Hanukkah Cake

    December 20, 2011 by Nina Spezzaferro

    In honor of it being the first day of Hanukkah, I just had to share this Sandra Lee creation, which I discovered last year via Food Network Humor. Enjoy!


  9. Bûche de Noël Gone Wrong

    December 13, 2011 by Nina Spezzaferro

    Two years ago I tried to make a Bûche de Noël and this is what happened. Isn’t this a sad, sad photo?

    For those that don’t know, Bûche de Noël is a traditional French Christmas cake that resembles a yule log. They’re made out of a thin sheet cake rolled with frosting and decorated to look like rustic wood. I’ve recently seen cake pans shaped like yule logs so bakers can make a shortcut version of this traditional dessert. And to anyone that’s used one, consider yourself a cheater.

    The allure of the Bûche de Noël started when I was 11 or 12. My dad was a partner at a store in a very chic neighborhood in Brooklyn. I worked weekends as a gift wrapper. One weekend the French bakery next door sent over a Bûche de Noël as a neighborly holiday gesture. It tasted… amazing.

    The following year I asked my dad if he could pick up a Bûche for Christmas and he returned home empty-handed because they were going for $40, which was a lot to pay for a cake in the ’90s (in my opinion and clearly Dad’s too).
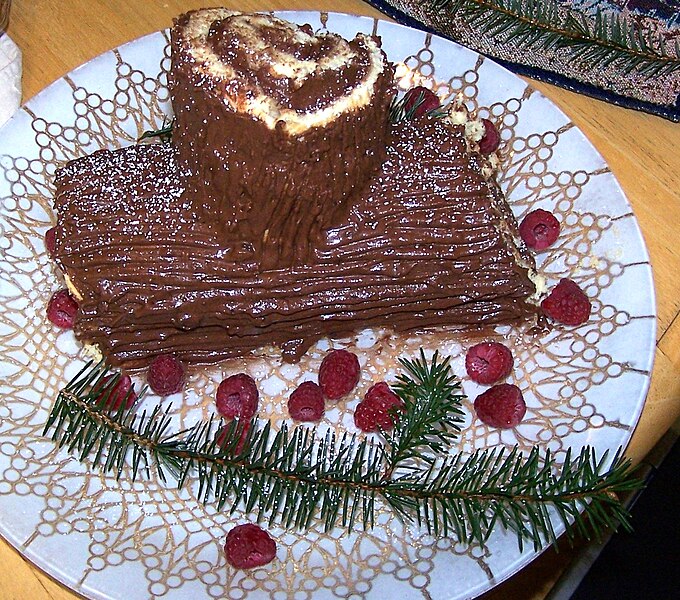
    This is what a well-executed Bûche de Noël looks like. Photograph of a Bûche de Noël, by Andrew Pendleton

    So I haven’t had a mere bite of Bûche de Noël since. Two years ago I attempted to make my own. I thought it would be easy and I was smart enough to do a trial run the weekend before Christmas. I even watched instructional YouTube videos. I baked the cake, made the buttercream, and even got the cake to successfully pop out of the jelly roll pan in one piece. Then I started to roll the cake and that’s when it started to crack and break and my dreams of baking a successful Bûche de Noël had crumbled.

    In just a few weeks, once 2012 is upon us, I’m going to start baking a cake a week. And hopefully by this time next year, I’ll be brave and skilled enough to attempt another Bûche de Noël.

    A version of this post originally appeared on my personal blog: NinaSpezz.com.

  10. This is why I’m scared of fondant

    December 9, 2011 by Nina Spezzaferro

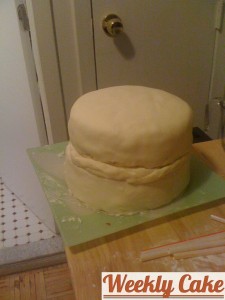
    Special thanks to my dear friend, John, for sharing this photo with me.

    This is a fondant cake made by the friend I previously mentioned asked me if I would be experimenting with fondant. And I think it’s pretty obvious why he asked.

    There are so many things wrong with this photo. Why are there straws beside the cake? Why is the cake so close to what appears to be a bathroom? What is the cake sitting on?

    When I first saw this cake photo, I forwarded it on to one of our mutual friends and she replied with, “Why does it look like a toilet?” John felt it looked more like a snowman.

    This is why I’m scared of fondant. Because it might result in a cake that looks like a toilet. It’s a valid concern.